Nut free Bliss Balls

Nut free Bliss Balls

These bliss balls are the perfect treat for people who cannot eat nuts. They are nut-free, dairy-free (if you use cacao nibs), raw, vegan and pack a nutritious little energy hit.

This recipe is perfect for children with allergies which means you can send them along to school with a healthy and nourishing lunchbox treat.

image-19

Ingredients

1 cup of dates
1 cup of desiccated coconut
2 teaspoons of cacao
1/4 cup of cacao nibs (can use chocolate chips)
2 tablespoons of melted coconut oil
Rind from 2 oranges
Juice from 2 oranges
1 tablespoon of vanilla
1/4 cup of desiccated coconut (for rolling the bliss balls in)

Method

Throw all the ingredients, apart from the extra desiccated coconut into the blender or food processor and process until the dates are fully combined. If the mixture is too dry you can add some water to ensure all the ingredients blend well.
Roll into balls and sprinkle with the remaining desiccated coconut. Freeze for an hour before serving.

L x

image-34

Raw Snickers Bars

Raw Snicker Bars

Snicker Bars would have to be one of my favorite chocolate bars so I wanted to re-create them by making a healthier option using whole ingredients and no refined sugar. These are so tasty and satisfying, I never want to eat a normal Snickers Bar again.
This recipe is very rich so you might only need to eat half of one to feel satisfied.

These raw Snickers Bars are gluten free, vegan, refined sugar free and dairy free (if using cacao butter over dark chocolate). Enjoy!

Ingredients

For the base

½ cup of coconut flour
1 cup of sliced almonds
½ cup of raw maple syrup

Middle layer

1 cup of medjool dates (these need to be soaked in water for 30 mins to 1 hour before blending)
Sprinkle of himalayan salt
1 tablespoon of pure vanilla
2 tablespoons of coconut oil
¼ cup of raw peanuts (cashews can be used if you are allergic to peanuts)

Top chocolate layer

100 grams cacao butter
6 tablespoons of raw cacao powder
3 tablespoons of coconut oil

If you are unable to get cacao butter or cacao powder you can use 200 grams of 70% dark chocolate and 3 tablespoons of coconut oil for the top chocolate layer.

Directions

To make the bottom layer blend the coconut flour, sliced almonds and maple syrup together until smooth. On baking paper shape the mixture into small oblongs and place in the freezer.

To make the middle layer take the dates out of the water and blend in a food processor, add the salt, peanuts, vanilla and melted coconut oil. This layer doesn’t need to be really smooth, I kept the mixture quite chunky. Add this mixture on top of the first layer, make sure it is spread evenly. Place back into the freezer.

To make the top chocolate layer melt the cacao butter and sift the cacao powder into the butter. Add the melted coconut oil and mix together. If you are using dark chocolate melt it along with the coconut oil.  Drizzle this evenly over the snicker bars and place in the freezer for an hour before serving.

IMG_5553 IMG_5559 IMG_5561

L x

Peanut Butter and Banana Cookies

This recipe is a healthy version of the usual unhealthy highly refined biscuits from the supermarket. These cookies are refined sugar free, high in fibre and vegan.
If you are unable to find raw maple syrup you can leave it out and add another tablespoon of coconut oil.
These cookies are great for school lunches and to have as a sweet treat.

Peanut Butter and Banana Cookies

Ingredients:

3 bananas
1/2 cup of peanut butter
1 tablespoon of vanilla essence
2 tablespoons of raw maple syrup
4 tablespoons of coconut oil
1 teaspoon of cinnamon
1 1/2 cups of rolled oats
1 cup of desiccated coconut
1 teaspoon of baking powder
1/2 cup of cacao nibs
1/4 teaspoon of himalayan salt

Method:

1. Preheat your oven to 180 degrees. In a large bowl mash the banana until there are no lumps. Add the vanilla, peanut butter, (melted) coconut oil, maple syrup and vanilla essence.
2. In a separate bowl mix the oats, cacao nibs, cinnamon, baking powder, salt and desiccated coconut. Add the wet mixture and mix well.
3. Line a baking tray with baking paper and roll up cookie mixture into small balls, this recipe makes around 15 cookies. Once the mixture in on the tray press each ball down with a fork and sprinkle with some desiccated coconut.
4. Bake the cookies for 15 minutes or until lightly golden.

These can be kept in an airtight container.

L x

image-29

Almond and Maca bites

Maca is an ingredient you should add as a staple in your pantry if it’s not already there.
20130225105958macaWhat is Maca?

Maca is a root plant that has been used as a food source for thousands of years.  It is grown in the Andes mountains of Peru where many Peruvians use it as a medicinal source.

I know that the word ‘superfood’ gets to thrown around quite a lot these days but if I had to pick any food to be classed as a superfood it would be Maca.

Maca contains all of the essential amino acids, minerals (iron, zinc, magnesium), vitamins such a B12, C and E and also enzymes.  Maca is often referred to as natures viagra and has long been used as a natural way of improving fertility and sexual performance.  Maca is what’s called an adaptogen, it adapts to your bodies metoabolism, ability to heal and is beneficial for your all around physical well being.  It balances the hypothalamus, adrenal glands, pancreas and thyroid.  According to Loving Earth because the levels of oestrogen, progesterone and testosterone are optimized this in turn helps regulate ovarian function and enables the adrenals to produce enough hormones to avoid symptoms during menopause.

Maca is often recommended to help support the immune system, boosting energy, a high source of complete protein, regulating the menstural cycle, helping to clear hormonal acne, stimulating fertility in men and women and increasing endurance and stamina.

Please note that if you are pregnant or breastfeeding that you check with your Doctor before taking maca powder as it can have effects on the hormonal system which may not be suitable for pregnant/breastfeeding women.

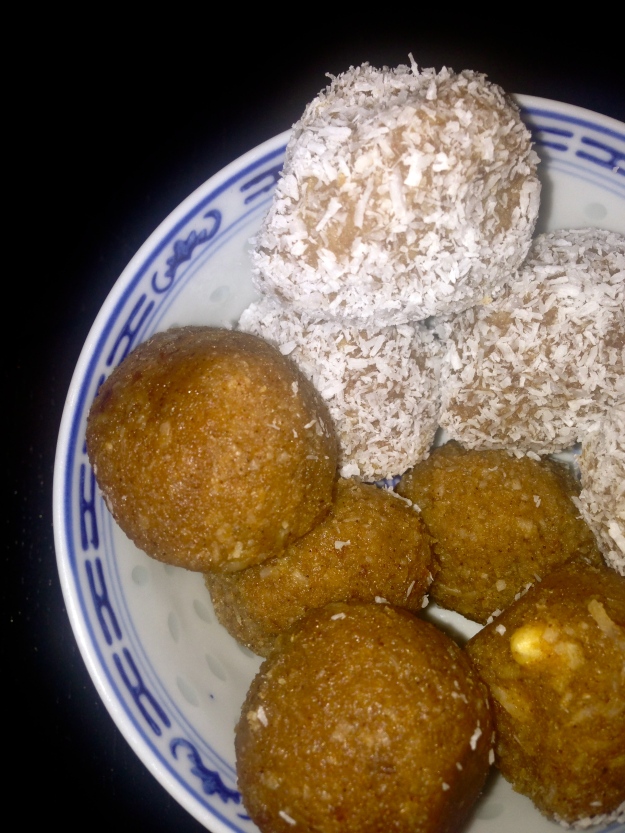
If you are not sure where to purchase Maca from we recommend these two brands – Life Foods and Loving Earth.  The best way to include Maca into your diet is by adding to smoothies (start off with 1 tsp and work your way up to 2 a day) or with these yummy almond and maca bites that I created.

photo-43

Ingredients:

8x Medjool dates, pitted
2 cups almond meal
2 tsp coconut sugar
2 tsp cinnamon
2 tsp Maca powder
1/2 cup raw cashews
1 cup shredded coconut
1/3 cup water
1/4 cup coconut oil, melted
optional: 1/2 cup shredded coconut to roll bites in.

Method: 

1. Add all ingredients into a food processor or blender if you have something powerful.  Turn on and blitz until all of the ingredients are a paste like consistency.  If the mixture is quite dry add some more water.

2. Using a teaspoon scoop out some of the mixture and then use that mixture to roll the ingredients into balls.  Set aside onto baking paper.  Roll each bite into shredded coconut and once finished with all of the mixture store the bites in the fridge.  If you want them to last longer store in the freezer.

Makes approximately 30 bites.

Julia xx

photo-42 photo-41

Lemon and Coconut Slice

Lemon and Coconut slice

This is a recipe for vegan, lemon and coconut slice.  The slice is nut free and refined sugar free, making it the perfect guilt free dessert or snack. The topping tastes beautiful, sweet and creamy and it has a burst of citrus.  This slice is so delicious and satisfying, you would never know its sugar free.
I have made this slice twice and I usually double the recipe as it gets eaten so fast! The slice can be kept in the fridge for around a week.

image-28

Ingredients:

Base:

3/4 cup oats (or buckwheat groats if you want it gluten-free)
1 cup pitted dates
3/4 cup desiccated coconut
2 tablespoons of organic vanilla essence
2 tablespoons of coconut sugar (optional)

Top layer:
1/3 cup melted coconut oil
1/4 cup raw maple syrup
Juice from 4 lemons
½ cup desiccated coconut
2 bananas

Directions:

In a food processor add the oats or buckwheat groats, coconut, dates and vanilla. Blend all the ingredients together until the mixture it has a sticky, paste like consistency.  Press into the bottom of a square-baking pan and put in the fridge.
To make the top layer blend all the ingredients until smooth. Taste the mixture and add more lemon juice or maple syrup if needed.  Spread the mixture on top of the base and sprinkle some more desiccated coconut over the top layer.  Place in the fridge overnight or until set.

L x

image-17

image-16

What is really in your children’s feeding products.

Many parents know the importance of feeding your children high nutrient, fresh and unprocessed foods.  The products you use to feed your children should be just as important as what you feed your children.  Babies skin absorbs moisture a lot faster than adults skin, chemicals can also cross through the skin barrier into the blood stream faster as their skin barrier is not fully developed unlike adults skin.  This is why alot of adults will grow out of any skin conditions they had as a child.

These days many children’s feeding products, bedding and clothing may contain Bisphenol-A (BPA), Petroleum and PolyVinyl Chloride (PVC).

BPA is a common chemical found in in plastic water bottles, babies bottles, lunch boxes, food containers and toys. It’s an endocrine disruptor that can alter the functioning of our endocrine system by mimicking the role of the body’s natural hormones. Created in 1891, the chemical was initially investigated for use as a replacement to estrogen.

Petroleum based products are not meant to be reused, they leach harmful chemicals into food and liquid if they have been heated.

PVC is a toxic plastic that contains harmful carcinogens, it is found in baby bottles, plastic cot mattresses, toys and plastic bibs.  Long term exposure to this toxin has been linked to liver damage and cancer.

These chemicals leach out of the plastic after repeated use, exposure to heat or a drawn out shelf life is provoking concern amongst health professionals.  A lot of baby products will only contain small amounts of these chemicals, but repeated exposure over a life time can cause health issues. People need to become more aware of what products they are using for their children to help prevent any problems that may arise when using these products.

I have recently discovered a New Zealand company called Little & Loved, owned and run by a ‘stay at home mum’ who has a passion for sustainable living. Little & Loved stock the most gorgeous baby products that are BPA free, Petroleum free and PVC free.  Many of the products are also organic, NZ made and disposable.

Check out the Little & Loved website for more information and have a look at their online store.

Libby xx

Black Bean and Cranberry Fudge

Black Bean and Cranberry Fudge

Chocolate fudge would have to be one of my favourite sweet treats, so for a while now I have been trying to make a healthy alternative to the usual highly refined sugar fudge. This recipe would have to be one of the healthiest fudge recipes that not only tastes great but nourishes the body.

This fudge is free from refined sugar, gluten and dairy, making it the perfect sweet treat that is guilt free. I have been trying to cut out sugar from my diet so I find that having a piece of this fudge satisfies my cravings for chocolate. Who would have thought black beans could taste so delicious!

Ingredients 

300g of black beans – rinsed, drained and dried
1 large mashed banana
1/2 cup cacao powder or cocoa powder
1/2 cup of dates
1 tsp stevia – I used Equal stevia
1/2 cup oats
2 tbs linseeds
2 tsp vanilla extract
1/2 cup cranberries

Optional

Dessicated coconut to coat
1/2 cup of nuts to add some crunch

Method

1. Add all the ingredients into the food processor and blend until smooth, I found that the dates took a bit longer to breakdown. The mixture should have a slightly thick consistency, if it is too runny add some more oats and if it is too thick add a little bit of water.
2. Add the mixture to a baking tray, I lined mine in baking paper. Sprinkle desiccated coconut over the mixture.
3. Place the fudge in the freezer for one hour before serving.  Cut the fudge into squares using a sharp knife. The fudge needs to be stored in a sealed container in the fridge.

Enjoy!

L x

2013-07-16 19.17.52

2013-07-16 19.58.45

2013-07-16 19.58.15

2013-07-16 20.12.28

2013-07-18 18.59.31

Kumara and Peanut Butter Rostis

Kumara and Peanut Butter Rostis

These kumara and peanut butter rostis make the perfect vegetarian meal for winter.  The rostis are full of beautiful flavours from the garlic, ginger, orange zest, chilli and peanut butter. I chose to bake the rostis instead of frying them which I usually do to make them healthier. They turn out golden and crispy and are amazing served with hummus or avocado.

The rostis can be served as a snack or used in meal as an alternative to meat.

Ingredients     8 rostis

3 medium sized kumaras
2 tbsp peanut butter (If you want it extra crunchy I would use 4 tbsp)
2 tbsp tamari (healthier alternative to soy sauce)
2 garlic cloves – crushed
1/2 tsp ground ginger or 1 tsp freshly grated ginger
1 tsp chilli flakes
zest of 1 orange
1/2 cup of chopped coriander and/or parsley
1/2 gluten free flour – I used rice flour
1 tbs ground linseed or chia seeds (used for binding the rostis)

I drizzled some hemp seed oil over the rostis before they went in the oven.

Method

1. Preheat the oven to 180C. Peel the kumara and slice in half, place into a pot of boiling water for 5 minutes. Drain off and let them cool down.
2. In a large bowl mix the peanut butter, tamari, garlic, ginger, chilli and orange zest.
3. Grate the kumara once it has cooled down, add this to the mixture and mix through. Add the flour, herbs and linseeds/chia seeds.
4. The mixture should be sticky, if not add a little bit of water and if it is too sticky add more flour. Line an oven tray with baking paper and sprinkle some flour onto it. Roll the mixture into 8 balls and place onto the tray, then flatten the balls.
5. I added more finely chipped coriander to the rostis and drizzled some hemp oil over them.
6. Bake the rostis at 180C for 20 minutes, remember to flip them after 10 minutes. They should be lightly golden.

L x

2013-07-16 18.19.35 2013-07-16 18.23.08 2013-07-16 18.51.19 2013-07-16 19.06.55 2013-07-16 19.48.23

2013-07-16 19.50.49

Mexican Rice Quinoa Bowl

Mexican Rice Quinoa Bowl

One of my favourite cuisines is Mexican food. This recipe is inspired by the spanish rice you get at Mexican restaurants. This is such an easy recipe to make and it is also inexpensive. It is a great warming winter meal that tastes so fresh with the lime juice and coriander.

This meal takes minimal effort to put together and its packed with heaps of protein from the quinoa and beans. You can add chicken to this recipe it if you didn’t want the vegetarian option. This meal can also be served with tacos or burritos.

Ingredients 

1 cup of brown rice
1 cup of quinoa
1 can of kidney beans
2 tomatoes
1 avocado
1 handful of coriander
Olive oil or hemp seed oil
1 lemon or lime
Salt and pepper

Method

1. Add two cups of water to a medium sized pot. Add a pinch of salt and add the brown rice, bring to boil. Stir the brown rice and add the quinoa, cover and reduce heat to a medium low.
The brown rice and quinoa should take around 20 minutes to cook. I add the quinoa to the rice five minutes later. Check packaging of the brown rice and quinoa for cooking times so both are cooked around the same time. Once the brown rice and quinoa is cooked take off the stove and let them cool down.

2. Place the kidney beans in a fry pan and simmer on a low heat for 7 minutes. Dice up the tomato, coriander and avocado.

3. Place some brown rice and quinoa mix into a bowl, add some kidney beans. Pile the rest of the ingredients on top and drizzle with oil and squeeze lemon or lime on top. Add some salt and pepper. Enjoy.

L x

2013-07-09 18.22.34

2013-07-09 18.42.10

2013-07-09 18.42.41

Friday Friends – Lynette Hill

Every Friday we interview one of our friends in the Health and Wellness industry.
This week I was lucky enough to interview Lynette Hill, who is a Naturopath and Homeopath based in Takapuna, Auckland. Lynette has recently opened a clinic called My Remedy.

Over six years ago I first went and saw Lynette for a Naturopathic consultation to help with some health issues I was having.  Lynette specialises in Hemaview which is a type of live blood screening that investigates the size, shape and ratio of your blood cells. Lynette was very helpful in getting my health back on track, I had such amazing results after seeing her which I am so grateful for. Lynette has worked in this health field for 8 years and is an expert at what she does. I cannot recommend her highly enough!

Check out the My Remedy website or Facebook page for more information.

Interview

Where abouts did you study and what did you study.

I studied at South Pacific School of Natural Medicine  (BNatMed) majoring in Homeopathy.

Where do you work.

My Remedy Integrated Natural Medicine Clinic

What are your hobbies.

Gardening.  Scrap booking and Hiking

What is your favorite quote.

“The natural healing force within each of us is the greatest force in getting well.”
-Hippocrates

 What sparked your interest in health.

My family – a child who had a severe reaction to his first vaccination forced me to look for other options – and then shortly afterwards my own diagnosis of cancer 13 years ago.  Both of which I found an answer for in natural medicine and practices.

 Your top three tips to optimal health.

Sleep (and if you can’t sleep – seek naturopathic and/or homeopathic help)

Honest communication – at home – at work – at play

A health full diet with plenty of water!
Contact details/website.

lynette@myremedy.co.nz

http://www.myremedy.co.nz

Lynette_office

Libby xx